

Thumbprint Art
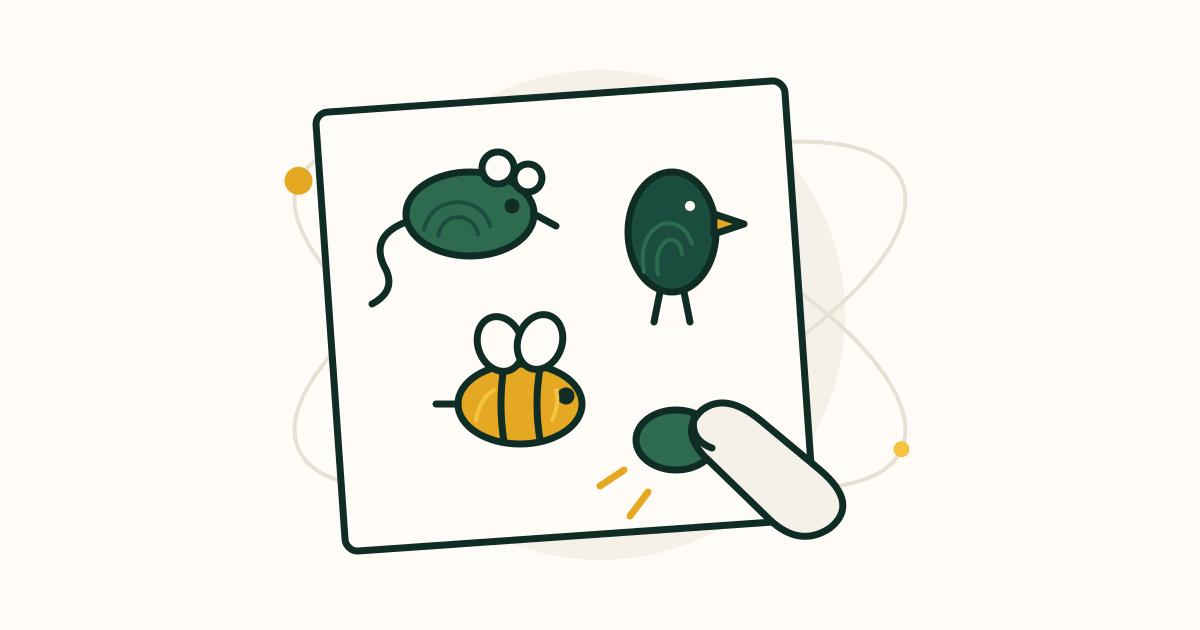
turns the oval your thumb leaves on paper into tiny animals with a few pen lines: two round ears and a tail make a mouse, a beak and legs make a bird. You can ink your thumb with a pencil scribble or a washable marker, so a pencil, a pen and a sheet of paper are all you need.
What you'll do
Ink your thumb with a pencil scribble or a washable marker, press 4 thumbprints on a sheet of paper, wash your thumb, then add pen lines to turn the prints into a mouse, a bird, a bee and one animal of your own.
At a glance
- Time
- 5 minutes for your first session
- Cost
- Nothing to buy. It uses things you already have at home.
- You need
- A pencil, the softer and darker the better, A pen with a fine tip, Plain paper, Soap and water, or a damp paper towel
- Members
What you need
Required
- A pencil, the softer and darker the better × 1 · $0 · household
This is your ink. Rubbing your thumb on a dark pencil scribble picks up graphite that prints a pale gray thumbprint and is dry right away. A soft pencil marked 2B or darker gives the darkest prints; an ordinary HB school pencil works if you scribble hard. Pencil prints come out lighter than marker; if yours are too faint, the clear-tape trick in step 1 makes them crisp.
Alternatives: A washable marker in any color, colored straight onto your thumb, A few drops of strong coffee or watercolor paint on a saucer
- A pen with a fine tip × 1 · $0 · household
A ballpoint or a thin felt-tip for the ears, eyes, legs and tails. Black or dark blue shows up best over the prints.
- Plain paper × 1 sheet, plus a scrap · $0 · household
Printer paper, the back of an envelope or a notebook page. The scrap is for the pencil scribble and a test print.
- Soap and water, or a damp paper towel × 1 · $0 · household
For cleaning your thumb before you draw, so you do not smudge the page. Pencil and washable marker come off with soap and warm water.
Nice to have
- Clear sticky tape × 4 pieces about 4 cm (1 1/2 inches) long · $0 · household
Only needed if your pencil prints come out too faint. The tape lifts a sharp gray print off your thumb that you stick onto the page.
How to do it
Pick up where you left off
Step ·
On the scrap paper, scribble a solid dark patch about 3 cm (1 1/4 inches) square with the pencil, pressing hard and going over it until it shines. Rub the soft pad of your thumb, the part below the nail, back and forth on the patch 5 times. Test it: press your thumb on the scrap next to the patch. It worked if you get a gray oval with faint curved lines in it. Pale? Scribble the patch darker and rub 5 more times. Still too faint? Use the tape trick: press a 4 cm (1 1/2 inch) piece of clear tape sticky side down on your inked thumb pad, peel it off and stick it flat on the scrap. The print shows sharp and gray through the tape, and you can do the same for every print in step 2. Use pieces only a little bigger than the print, because a ballpoint skips on tape; a felt-tip writes on it fine. With a washable marker instead, color the whole pad of your thumb, then test the same way. Common mistake: using a permanent marker. It stains skin for days; only washable markers belong on your thumb.
Show helpHide help
pad of the thumb: The soft, rounded part of your thumb below the nail, on the palm side. It holds your fingerprint ridges and makes the oval print.
graphite: The gray material in a pencil. Rubbed onto skin, it works like a dry ink pad and washes off with soap.
Tip: Common mistake: too much ink. A thumb loaded with marker or paint prints a flat blob with no ridges. Press once on the scrap first, then print on the good sheet.
On the clean sheet, press 4 thumbprints with about 4 cm (1 1/2 inches) between them, and re-ink your thumb before each one. For each print, put your thumb down flat, hold it for a count of 2 without wiggling, and lift it straight up. Make print 1 and print 3 lying sideways (thumb pointing left), and print 2 and print 4 standing upright (thumb pointing up). It worked if you have 4 clear ovals, 2 wide and 2 tall, with no smears. Common mistake: rolling or sliding your thumb, which blurs the print into a smudge. Down, count 2, straight up.
Show helpHide help
ridges: The fine curved lines on your fingertip. A good print shows them as faint swirls inside the oval.
Tip: Common mistake: too much ink. A thumb loaded with marker or paint prints a flat blob with no ridges. Press once on the scrap first, then print on the good sheet.
Before you pick up the pen, wash your thumb with soap and warm water for about 20 seconds, or wipe it hard on a damp paper towel until the towel comes away clean. Pencil and washable marker come off easily; coffee rinses off with water. If you used paint, wash before it dries on your skin. It worked if pressing your thumb on the scrap leaves no mark. Common mistake: drawing with an inky thumb and leaving gray smudges next to your animals.
Show helpHide help
Tip: Common mistake: too much ink. A thumb loaded with marker or paint prints a flat blob with no ridges. Press once on the scrap first, then print on the good sheet.
With a marker or coffee print, wait 30 seconds so it is dry; pencil prints are ready now. Mouse, on print 1 (sideways): at the right end, draw a small pointed nose that sticks out, 2 small circles on top near that end for ears, a dot for an eye just below the ears, 3 short whiskers off the nose, and a long wiggly line off the left end for the tail. Bird, on print 2 (upright): draw a small triangle sticking out of the right side near the top for a beak, a dot for an eye just behind it, a curved line across the middle for a wing, and 2 short lines out of the bottom for legs, each with 3 tiny toes. It worked if someone could name both animals without being told. Common mistake: drawing all over the print. Most of the lines go on or just outside its edge; the oval does the body.
Show helpHide help
Tip: Common mistake: too much ink. A thumb loaded with marker or paint prints a flat blob with no ridges. Press once on the scrap first, then print on the good sheet.
Bee, on print 3 (sideways): draw 2 or 3 curved stripes across the body, 2 loops on top for wings, a dot eye at the right end and a short pointed stinger at the left. On print 4 (upright), pick your own: two triangle ears and whiskers make a cat, two long ears make a rabbit, a spiral drawn over the print and two little feelers make a snail. You did it: four thumbprints became four little animals in five minutes. Next time, press two overlapping prints, a big one for a body and a smaller one from your little finger for a head, and make a bear or a penguin.
Show helpHide help
Tip: Common mistake: too much ink. A thumb loaded with marker or paint prints a flat blob with no ridges. Press once on the scrap first, then print on the good sheet.
Tips
Common mistake: too much ink. A thumb loaded with marker or paint prints a flat blob with no . Press once on the scrap first, then print on the good sheet.
If you are right-handed, draw from left to right across the page so your hand does not drag through pencil prints and smudge them. Left-handed, work the other way.
Keep the pen lines few and small. A dot eye, two ears and a tail are enough; the shape of the print does the rest.
Different fingers give different sizes. Your thumb makes bodies, your index finger makes medium heads, and your little finger makes tiny heads, chicks and bugs.
Glossary
- thumbprint art
- Drawings built on the oval mark your thumb or finger leaves on paper, finished with a few pen lines. Also called fingerprint art.
- pad of the thumb
- The soft, rounded part of your thumb below the nail, on the palm side. It holds your fingerprint ridges and makes the oval print.
- graphite
- The gray material in a pencil. Rubbed onto skin, it works like a dry ink pad and washes off with soap.
- ridges
- The fine curved lines on your fingertip. A good print shows them as faint swirls inside the oval.
Communities
Resources
- Fingerprint Art for Kids (The Artful Parent)A short family how-to with photos and a video: stamp-pad fingerprints turned into people, animals and flowers with a few pen lines.
- Ed Emberley's Fingerprint Drawing Book (Hachette)The classic 48-page step-by-step book on turning fingerprints and a few lines into animals, trains, dragons and more, for ages 7 and up.
Frequently asked questions
How long does thumbprint art take?
A sheet of 4 thumbprint animals takes about 5 minutes, including washing your thumb. A full card or a page of 10 or more takes 15 to 20 minutes.
Do I need an ink pad?
No. A dark pencil scribble or a washable marker colored onto your thumb works. Pencil gives paler prints; if they are too faint, press clear tape on your inked thumb and stick the tape on the paper. An ink pad or a dab of paint gives bolder color if you have one, but wash it off before it dries.
Why are my prints just blobs?
There is too much ink, or your thumb moved. Press once on scrap paper to take off the extra, then put your thumb down flat, count 2 and lift straight up.
Will it stain my skin?
Pencil, washable marker and coffee all wash off with soap and warm water in about 20 seconds. Never use a permanent marker on skin.
My pencil prints smudge when I draw on them. What can I do?
Wash your thumb first, then rest your drawing hand on a scrap of paper laid over the prints you are not working on. Drawing from left to right (right to left if you are left-handed) also helps.
What else can I make with thumbprints?
Try a row of prints as a caterpillar, a cluster as a bunch of grapes or a tree's leaves, or two prints side by side as a heart for a card. Overlapping prints of different fingers make heads and bodies for bears, penguins and people.
Something off in this guide?